大前端
yarn与npm命令对比
服务端渲染基础
函数式编程-review
函数式编程范式
混子前端24个ES6代码片段
Nuxt.js基础
Nuxt.js 综合案例
hexo-theme-matery主题使用
搭建自己的SSR
部署Hexo到自己的Linux服务器上
有道无术,术尚可求。有术无道,止于术!
-
+
首页
Nuxt.js 综合案例
## Nuxt.js 综合案例 ## 介绍 - GitHub仓库:https://github.com/gothinkster/realworld - 在线示例:https://demo.realworld.io/#/ - 接口文档:https://github.com/gothinkster/realworld/tree/master/api - 页面模板:https://github.com/gothinkster/realworld-starter-kit/blob/master/FRONTEND_INSTRUCTIONS.md ## 创建项目 ```bash # 创建项目目录 mkdir realworld-nuxtjs # 进入项目目录 cd realworld-nuxtjs # 生成 package.json 文件 npm init -y # 安装 nuxt 依赖 npm install nuxt ``` 在 `package.json` 中添加启动脚本: ```json "scripts": { "dev": "nuxt" } ``` 创建 `pages/index.vue` : ```html <template> <div> <h1>Home Page</h1> </div> </template> <script> export default { name: 'HomePage' } </script> <style> </style> ``` ## 导入样式资源 当前目录结构: 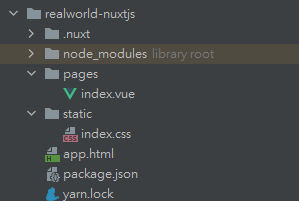 `app.html`: ```html <!DOCTYPE html> <html {{ HTML_ATTRS }}> <head {{ HEAD_ATTRS }}> {{ HEAD }} <!-- Import Ionicon icons & Google Fonts our Bootstrap theme relies on --> <link href="https://cdn.jsdelivr.net/npm/ionicons@2.0.1/css/ionicons.min.css" rel="stylesheet" type="text/css"> <link href="//fonts.googleapis.com/css?family=Titillium+Web:700|Source+Serif+Pro:400,700|Merriweather+Sans:400,700|Source+Sans+Pro:400,300,600,700,300italic,400italic,600italic,700italic" rel="stylesheet" type="text/css"> <!-- Import the custom Bootstrap 4 theme from our hosted CDN --> <link rel="stylesheet" href="/index.css"> </head> <body {{ BODY_ATTRS }}> {{ APP }} </body> </html> ``` ## 配置布局组件 `pages/layout/index.vue` ```html <template> <div> <!-- header --> <nav class="navbar navbar-light"> <div class="container"> <a class="navbar-brand" href="index.html">conduit</a> <ul class="nav navbar-nav pull-xs-right"> <li class="nav-item"> <!-- Add "active" class when you're on that page" --> <a class="nav-link active" href="">Home</a> </li> <li class="nav-item"> <a class="nav-link" href=""> <i class="ion-compose"></i> New Post </a> </li> <li class="nav-item"> <a class="nav-link" href=""> <i class="ion-gear-a"></i> Settings </a> </li> <li class="nav-item"> <a class="nav-link" href="">Sign up</a> </li> </ul> </div> </nav> <!-- header --> <!-- 子路由 --> <nuxt-child/> <!-- footer --> <footer> <div class="container"> <a href="/" class="logo-font">conduit</a> <span class="attribution"> An interactive learning project from <a href="https://thinkster.io">Thinkster</a>. Code & design licensed under MIT. </span> </div> </footer> <!-- footer --> </div> </template> <script> export default { name: "LayoutIndex" } </script> <style scoped> </style> ``` 添加`nuxt.config.js`配置文件,配置自定义路由表 ```js /* * Nuxt.js配置文件 * */ module.exports = { router: { // 自定义路由表规则 extendRoutes(routes, resolve) { // 首先清空数组,清空nuxt默认生成的路由表 routes.splice(0) routes.push(...[ { path: '/', component: resolve(__dirname, 'pages/layout'), children: [ { path: '', // 默认子路由 name: 'home', component: resolve(__dirname, 'pages/home') } ] }, ]) } } } ``` 添加`pages/home/index.vue`,并配置默认子路由 ```html <template> <div class="home-page"> <div class="banner"> <div class="container"> <h1 class="logo-font">conduit</h1> <p>A place to share your knowledge.</p> </div> </div> <div class="container page"> <div class="row"> <div class="col-md-9"> <div class="feed-toggle"> <ul class="nav nav-pills outline-active"> <li class="nav-item"> <a class="nav-link disabled" href="">Your Feed</a> </li> <li class="nav-item"> <a class="nav-link active" href="">Global Feed</a> </li> </ul> </div> <div class="article-preview"> <div class="article-meta"> <a href="profile.html"><img src="http://i.imgur.com/Qr71crq.jpg"/></a> <div class="info"> <a href="" class="author">Eric Simons</a> <span class="date">January 20th</span> </div> <button class="btn btn-outline-primary btn-sm pull-xs-right"> <i class="ion-heart"></i> 29 </button> </div> <a href="" class="preview-link"> <h1>How to build webapps that scale</h1> <p>This is the description for the post.</p> <span>Read more...</span> </a> </div> <div class="article-preview"> <div class="article-meta"> <a href="profile.html"><img src="http://i.imgur.com/N4VcUeJ.jpg"/></a> <div class="info"> <a href="" class="author">Albert Pai</a> <span class="date">January 20th</span> </div> <button class="btn btn-outline-primary btn-sm pull-xs-right"> <i class="ion-heart"></i> 32 </button> </div> <a href="" class="preview-link"> <h1>The song you won't ever stop singing. No matter how hard you try.</h1> <p>This is the description for the post.</p> <span>Read more...</span> </a> </div> </div> <div class="col-md-3"> <div class="sidebar"> <p>Popular Tags</p> <div class="tag-list"> <a href="" class="tag-pill tag-default">programming</a> <a href="" class="tag-pill tag-default">javascript</a> <a href="" class="tag-pill tag-default">emberjs</a> <a href="" class="tag-pill tag-default">angularjs</a> <a href="" class="tag-pill tag-default">react</a> <a href="" class="tag-pill tag-default">mean</a> <a href="" class="tag-pill tag-default">node</a> <a href="" class="tag-pill tag-default">rails</a> </div> </div> </div> </div> </div> </div> </template> <script> export default { name: "HomeIndex" } </script> <style scoped> </style> ``` 当前效果: 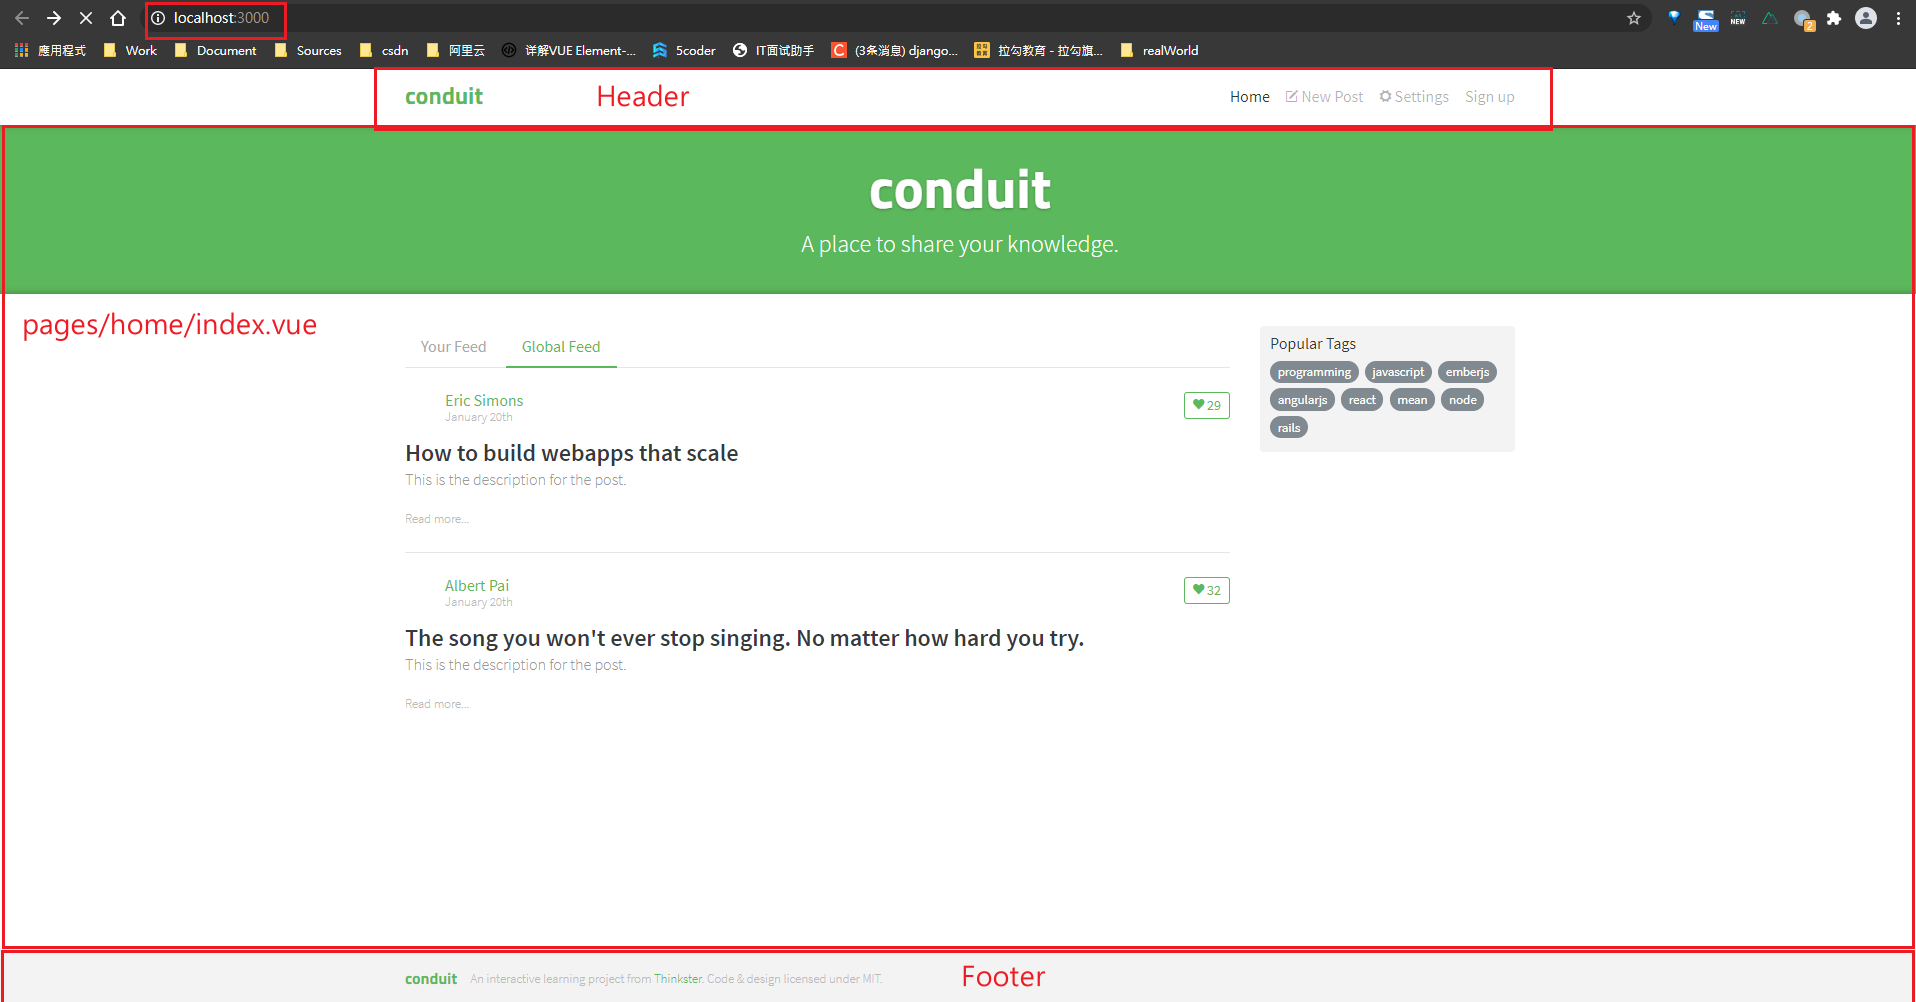 访问localhost:3000时,首先加载pages/index.vue组件,在nuxt-child中加载子路由,子路由path为空字符串‘’,因此访问localhost:3000时会同时加载`pages/index.vue`、`pages/layout/index.vue`、`pages/home/index.vue`三个组件 ## 登录注册 在模板网址中找到登录模板,由于当前项目登录/注册业务不复杂,所以使用同一个组件模板,利用`this.$route.name`将其处理为动态组件。其中需要处理文字显示、按钮显示、路有指向,代码如下: `pages/login/index.vue` - 整体: ```html <template> <div class="auth-page"> <div class="container page"> <div class="row"> <div class="col-md-6 offset-md-3 col-xs-12"> <h1 class="text-xs-center">{{ isLogin ? 'Sign in' : 'Sign up' }}</h1> <p class="text-xs-center"> <nuxt-link v-if="isLogin" to="/register">Need an account?</nuxt-link> <nuxt-link v-else to="/login">Have an account?</nuxt-link> </p> <ul class="error-messages"> <li>That email is already taken</li> </ul> <form> <fieldset v-if="!isLogin" class="form-group"> <input class="form-control form-control-lg" type="text" placeholder="Your Name"> </fieldset> <fieldset class="form-group"> <input class="form-control form-control-lg" type="text" placeholder="Email"> </fieldset> <fieldset class="form-group"> <input class="form-control form-control-lg" type="password" placeholder="Password"> </fieldset> <button class="btn btn-lg btn-primary pull-xs-right"> {{ isLogin ? 'Sign in' : 'Sign up' }} </button> </form> </div> </div> </div> </div> </template> <script> export default { name: "LoginIndex", computed: { isLogin() { return this.$route.name === 'login' } } } </script> <style scoped> </style> ``` - 动态部分: 动态控制 ```js computed: { isLogin() { return this.$route.name === 'login' } } ``` - 文字显示 ```html <h1 class="text-xs-center">{{ isLogin ? 'Sign in' : 'Sign up' }}</h1> <p class="text-xs-center"> <nuxt-link v-if="isLogin" to="/register">Need an account?</nuxt-link> <nuxt-link v-else to="/login">Have an account?</nuxt-link> </p> ``` - 输入框 ```html <fieldset v-if="!isLogin" class="form-group"> <input class="form-control form-control-lg" type="text" placeholder="Your Name"> </fieldset> ``` - 按钮 ```html <button class="btn btn-lg btn-primary pull-xs-right"> {{ isLogin ? 'Sign in' : 'Sign up' }} </button> ``` ## 导入剩余页面 | 路径 | 页面 | | ------------------------------ | ------------------- | | `/` | 首页 | | `/login` | 登录 | | `/register` | 注册 | | `/settings` | 用户设置 | | `/editor` | 发布文章 | | `/editor/:slug` | 编辑文章 | | `/profile/:username` | 文章详情 | | `/profile/:username/favorites` | 用户页面/喜欢的文章 | ### 用户页面 pages/profile/index.vue ```html <template> <div class="profile-page"> <div class="user-info"> <div class="container"> <div class="row"> <div class="col-xs-12 col-md-10 offset-md-1"> <img src="http://i.imgur.com/Qr71crq.jpg" class="user-img"/> <h4>Eric Simons</h4> <p> Cofounder @GoThinkster, lived in Aol's HQ for a few months, kinda looks like Peeta from the Hunger Games </p> <button class="btn btn-sm btn-outline-secondary action-btn"> <i class="ion-plus-round"></i> Follow Eric Simons </button> </div> </div> </div> </div> <div class="container"> <div class="row"> <div class="col-xs-12 col-md-10 offset-md-1"> <div class="articles-toggle"> <ul class="nav nav-pills outline-active"> <li class="nav-item"> <a class="nav-link active" href="">My Articles</a> </li> <li class="nav-item"> <a class="nav-link" href="">Favorited Articles</a> </li> </ul> </div> <div class="article-preview"> <div class="article-meta"> <a href=""><img src="http://i.imgur.com/Qr71crq.jpg"/></a> <div class="info"> <a href="" class="author">Eric Simons</a> <span class="date">January 20th</span> </div> <button class="btn btn-outline-primary btn-sm pull-xs-right"> <i class="ion-heart"></i> 29 </button> </div> <a href="" class="preview-link"> <h1>How to build webapps that scale</h1> <p>This is the description for the post.</p> <span>Read more...</span> </a> </div> <div class="article-preview"> <div class="article-meta"> <a href=""><img src="http://i.imgur.com/N4VcUeJ.jpg"/></a> <div class="info"> <a href="" class="author">Albert Pai</a> <span class="date">January 20th</span> </div> <button class="btn btn-outline-primary btn-sm pull-xs-right"> <i class="ion-heart"></i> 32 </button> </div> <a href="" class="preview-link"> <h1>The song you won't ever stop singing. No matter how hard you try.</h1> <p>This is the description for the post.</p> <span>Read more...</span> <ul class="tag-list"> <li class="tag-default tag-pill tag-outline">Music</li> <li class="tag-default tag-pill tag-outline">Song</li> </ul> </a> </div> </div> </div> </div> </div> </template> <script> export default { name: "UserProfile" } </script> <style scoped> </style> ``` ### 用户设置 `pages/settings` ```html <template> <div class="settings-page"> <div class="container page"> <div class="row"> <div class="col-md-6 offset-md-3 col-xs-12"> <h1 class="text-xs-center">Your Settings</h1> <form> <fieldset> <fieldset class="form-group"> <input class="form-control" type="text" placeholder="URL of profile picture"> </fieldset> <fieldset class="form-group"> <input class="form-control form-control-lg" type="text" placeholder="Your Name"> </fieldset> <fieldset class="form-group"> <textarea class="form-control form-control-lg" rows="8" placeholder="Short bio about you"></textarea> </fieldset> <fieldset class="form-group"> <input class="form-control form-control-lg" type="text" placeholder="Email"> </fieldset> <fieldset class="form-group"> <input class="form-control form-control-lg" type="password" placeholder="Password"> </fieldset> <button class="btn btn-lg btn-primary pull-xs-right"> Update Settings </button> </fieldset> </form> </div> </div> </div> </div> </template> <script> export default { name: "SettingsIndex" } </script> <style scoped> </style> ``` ### 创建文章 `editor/inde.vue` ```html <template> <div class="editor-page"> <div class="container page"> <div class="row"> <div class="col-md-10 offset-md-1 col-xs-12"> <form> <fieldset> <fieldset class="form-group"> <input type="text" class="form-control form-control-lg" placeholder="Article Title"> </fieldset> <fieldset class="form-group"> <input type="text" class="form-control" placeholder="What's this article about?"> </fieldset> <fieldset class="form-group"> <textarea class="form-control" rows="8" placeholder="Write your article (in markdown)"></textarea> </fieldset> <fieldset class="form-group"> <input type="text" class="form-control" placeholder="Enter tags"><div class="tag-list"></div> </fieldset> <button class="btn btn-lg pull-xs-right btn-primary" type="button"> Publish Article </button> </fieldset> </form> </div> </div> </div> </div> </template> <script> export default { name: "EditorIndex" } </script> <style scoped> </style> ``` ### 文章详情 `pages/editor` ```html <template> <div class="editor-page"> <div class="container page"> <div class="row"> <div class="col-md-10 offset-md-1 col-xs-12"> <form> <fieldset> <fieldset class="form-group"> <input type="text" class="form-control form-control-lg" placeholder="Article Title"> </fieldset> <fieldset class="form-group"> <input type="text" class="form-control" placeholder="What's this article about?"> </fieldset> <fieldset class="form-group"> <textarea class="form-control" rows="8" placeholder="Write your article (in markdown)"></textarea> </fieldset> <fieldset class="form-group"> <input type="text" class="form-control" placeholder="Enter tags"><div class="tag-list"></div> </fieldset> <button class="btn btn-lg pull-xs-right btn-primary" type="button"> Publish Article </button> </fieldset> </form> </div> </div> </div> </div> </template> <script> export default { name: "EditorIndex" } </script> <style scoped> </style> ``` ## 处理顶部导航链接 将模板中的`a`链接全部替换为`nuxt-link` `pages/layout/index.vue` ```html <template> <div> <!-- header --> <nav class="navbar navbar-light"> <div class="container"> <nuxt-link class="navbar-brand" to="/">Home</nuxt-link> <ul class="nav navbar-nav pull-xs-right"> <li class="nav-item"> <!-- Add "active" class when you're on that page" --> <nuxt-link class="nav-link" to="/" exact> Home </nuxt-link> </li> <li class="nav-item"> <nuxt-link class="nav-link" to="/editor"> <i class="ion-compose"></i> New Post </nuxt-link> </li> <li class="nav-item"> <nuxt-link class="nav-link" to="/settings"> <i class="ion-gear-a"></i> Settings </nuxt-link> </li> <li class="nav-item"> <nuxt-link class="nav-link" to="/register">Sign up</nuxt-link> </li> <li class="nav-item"> <nuxt-link class="nav-link" to="/login">Sign in</nuxt-link> </li> <li class="nav-item"> <nuxt-link class="nav-link" to="/profile/123"> <img class="user-pic" src="https://pic1.zhimg.com/80/v2-3358e380b520aaa16d4c16bbacb7dab9_720w.jpg?source=1940ef5c"> 5coder </nuxt-link> </li> </ul> </div> </nav> <!-- header --> <!-- 子路由 --> <nuxt-child/> <!-- footer --> <footer> <div class="container"> <a href="/" class="logo-font">conduit</a> <span class="attribution"> An interactive learning project from <a href="https://thinkster.io">Thinkster</a>. Code & design licensed under MIT. </span> </div> </footer> <!-- footer --> </div> </template> <script> export default { name: "LayoutIndex" } </script> <style scoped> </style> ``` 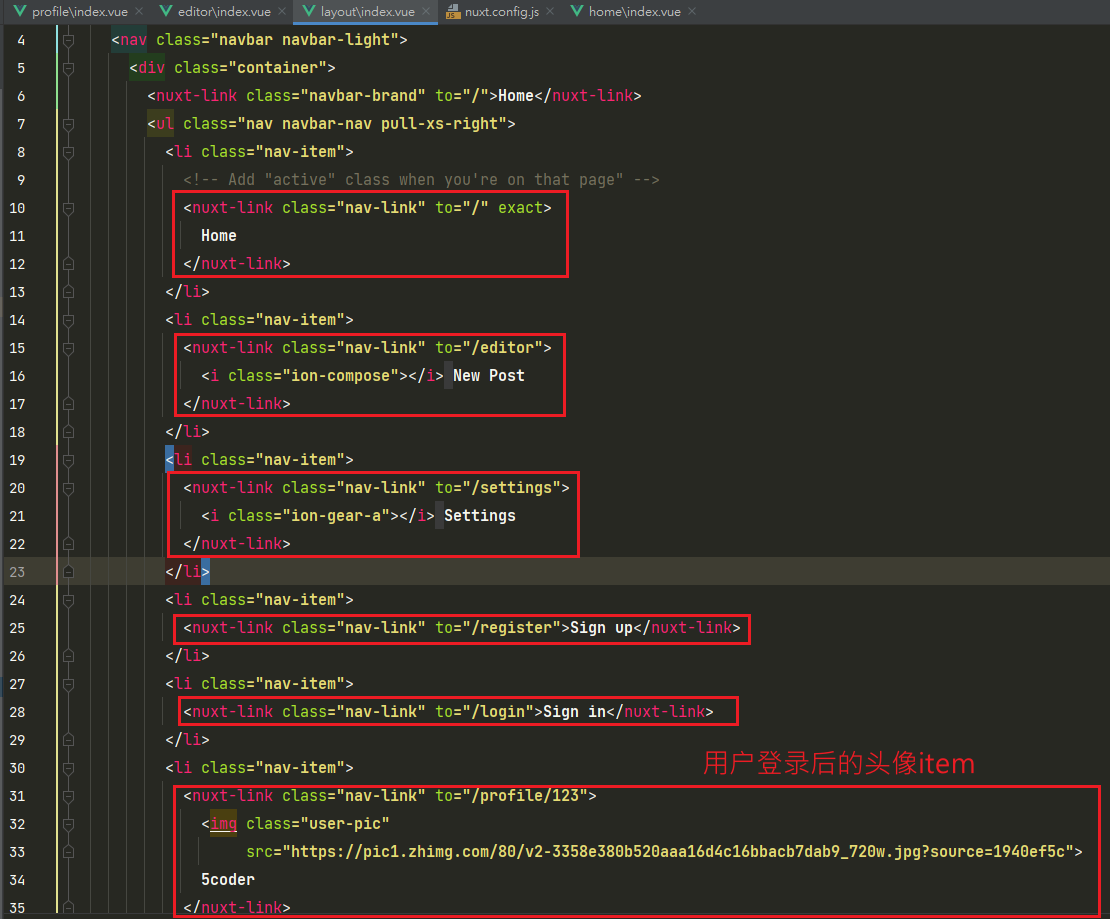 ## 处理导航链接高亮 - 修改nuxt.js提供的路有导航高亮,默认值为`nuxt-link-active`,修改为模板中定义的`active`([官方文档](https://zh.nuxtjs.org/docs/2.x/configuration-glossary/configuration-router#linkactiveclass)) `vue.config.js` ```js module.exports = { router: { // 自定义路由表规则 extendRoutes(routes, resolve) { // 首先清空数组,清空nuxt默认生成的路由表 routes.splice(0) routes.push(...[ { path: '/', component: resolve(__dirname, 'pages/layout'), children: [ { path: '', // 默认子路由 name: 'home', component: resolve(__dirname, 'pages/home/') }, { path: '/login', name: 'login', component: resolve(__dirname, 'pages/login/') }, { path: '/register', name: 'register', component: resolve(__dirname, 'pages/login/') }, { path: '/profile/:username', name: 'profile', component: resolve(__dirname, 'pages/profile/') }, { path: '/settings/', name: 'settings', component: resolve(__dirname, 'pages/settings/') }, { path: '/editor/', name: 'editor', component: resolve(__dirname, 'pages/editor/') }, { path: '/article/:slug', name: 'article', component: resolve(__dirname, 'pages/article/') }, ] } ]) }, linkActiveClass: 'active' // default nav-link-active } } ``` - 修改精确匹配,当`Home`中的路由为/时,默认会适用`active`,需要将其修改为精确匹配,这样在子组件激活时,`Home`不会高亮激活。([官方文档](https://zh.nuxtjs.org/docs/2.x/configuration-glossary/configuration-router#linkexactactiveclass)) `pages/layout/index.vue` ```html <li class="nav-item"> <!-- Add "active" class when you're on that page" --> <nuxt-link class="nav-link" to="/" exact> Home </nuxt-link> </li> ``` 当前目录结构: 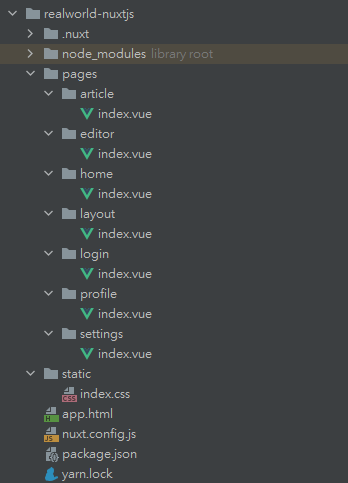 ## 封装请求模块 - 使用`axios`封装请求模块 - 安装axios:`yarn add axios` - 创建目录及文件`utils/request.js` ```js import axios from 'axios' const request = axios.create({ baseURL: 'https://conduit.productionready.io' }) export default request ``` ## 登录注册 ### 实现基本登录功能 - 登录接口 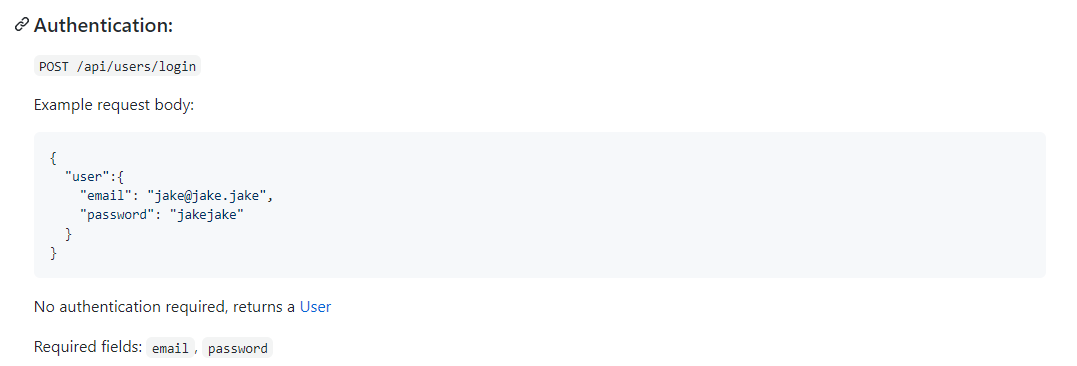 `pages/login/index.vue` ```html <template> <div class="auth-page"> <div class="container page"> <div class="row"> <div class="col-md-6 offset-md-3 col-xs-12"> <h1 class="text-xs-center">{{ isLogin ? 'Sign in' : 'Sign up' }}</h1> <p class="text-xs-center"> <nuxt-link v-if="isLogin" to="/register">Need an account?</nuxt-link> <nuxt-link v-else to="/login">Have an account?</nuxt-link> </p> <ul class="error-messages"> <li>That email is already taken</li> </ul> <!--添加submit提交事件,并使用prevent取消默认提交事件--> <form @submit.prevent="onSubmit"> <fieldset v-if="!isLogin" class="form-group"> <input class="form-control form-control-lg" type="text" placeholder="Your Name"> </fieldset> <!--使用v-model绑定数据--> <fieldset class="form-group"> <input class="form-control form-control-lg" type="text" placeholder="Email" v-model="user.email"> </fieldset> <fieldset class="form-group"> <input class="form-control form-control-lg" type="password" placeholder="Password" v-model="user.password"> </fieldset> <button class="btn btn-lg btn-primary pull-xs-right"> {{ isLogin ? 'Sign in' : 'Sign up' }} </button> </form> </div> </div> </div> </div> </template> <script> import request from '@/utils/request' export default { name: "LoginIndex", data() { return { user: { email: '', password: '' } } }, computed: { isLogin() { return this.$route.name === 'login' } }, methods: { async onSubmit() { // 提交表单请求登录 const {data} = await request({ method: 'POST', url: '/api/users/login', data: { user: this.user } }) console.log(data) // TODO 保存用户登录状态 // 跳转到首页 this.$router.push('/') } } } </script> <style scoped> </style> ``` ### 封装请求方法 为了维护方便,将请求单独再封装 创建目录及文件`api/user.js` ```js import request from "@/utils/request"; // 用户登录 export const login = data => { return request({ method: 'POST', url: '/api/users/login', data }) } // 用户注册 export const register = data => { return request({ method: 'POST', url: '/api/users', data }) } ``` 修改`login.vue`中使用的登录请求 ```js export default { name: "LoginIndex", data() { return { user: { email: '', password: '' } } }, computed: { isLogin() { return this.$route.name === 'login' } }, methods: { async onSubmit() { // 提交表单请求登录,使用刚才封装好的user.js const {data} = await login({ user: this.user }) console.log(data) // TODO 保存用户登录状态 // 跳转到首页 this.$router.push('/') } } } ``` ### 表单验证 使用HTML原始的验证,分别在`input`中添加`required`和修改`type="emial"` ```html <!--使用v-model绑定数据--> <fieldset class="form-group"> <input class="form-control form-control-lg" type="email" required placeholder="Email" v-model="user.email"> </fieldset> <fieldset class="form-group"> <input class="form-control form-control-lg" type="password" required placeholder="Password" v-model="user.password"> </fieldset> ``` ### 错误处理 - 此处处理用户登录错误时的显示内容 - 未处理时,登录请求错误会出现如下页面: 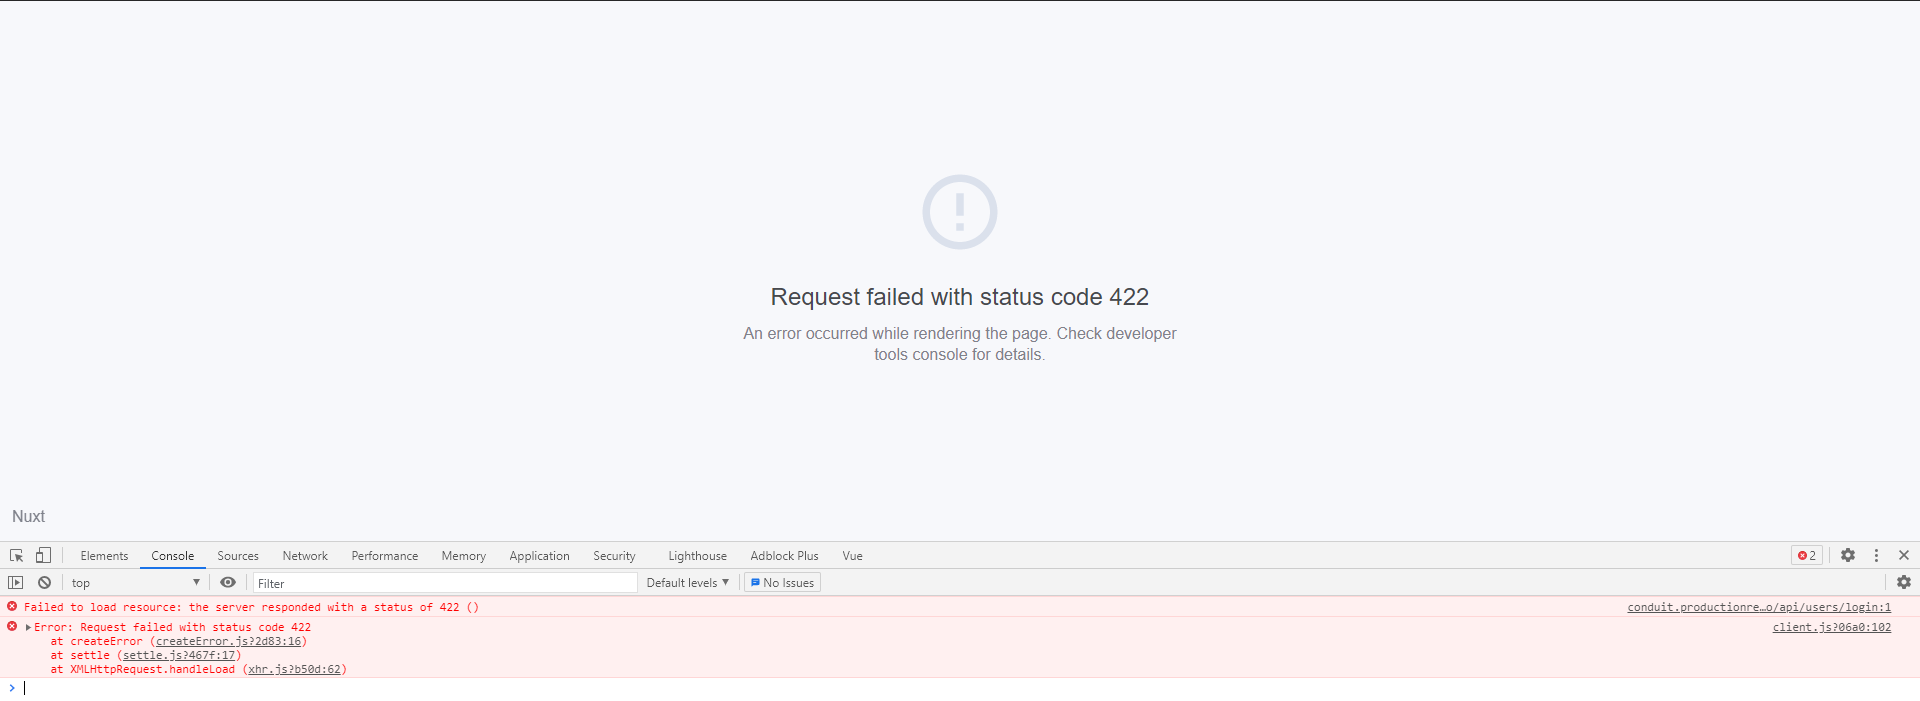 - 错误信息如下: -  - 使用`try {} catch {err}`捕获异常 ```js try { // 提交表单请求登录 const {data} = await login({ user: this.user }) console.log(data) // TODO 保存用户登录状态 // 跳转到首页 this.$router.push('/') } catch (err) { // 请求失败 console.dir(err) this.errors = err.response.data.errors } ``` - 在data中定义errors数据:`errors:{}`初始化为空对象 - 在html模板中遍历出该错误信息 ```html <ul class="error-messages"> <template v-for="(messages, field) of errors"> <li v-for="(message,index) in messages" :key="index">{{ field }} {{ message }}</li> </template> </ul> ``` - 处理完错误后页面如下:  ### 用户注册 由于注册需要提供用户名,所以在data中的user中添加username,并使用v-model绑定到input框中。 ```js data() { return { user: { username: '', email: '', password: '' }, errors: {} // 错误信息 } } ``` 注册和登录的逻辑相似,因此只需要在调用login和register时做判断即可,同时发现注册时,用户提供的密码在后端做了验证,必须大于等于8为,因此在前端也进行验证。在password字段中添加`minlength='8'`: ```html <input class="form-control form-control-lg" type="password" minlength="8" required placeholder="Password" v-model="user.password"> ``` ```js async onSubmit() { try { // 提交表单请求登录 const {data} = this.isLogin ? await login({ user: this.user }) : await register({ user: this.user }) console.log(data) // TODO 保存用户登录状态 // 跳转到首页 this.$router.push('/') } catch (err) { // 请求失败 console.dir(err) this.errors = err.response.data.errors } } ``` ### 存储用户登录状态 #### (1)初始化容器数据 ```js // 在服务端渲染期间,运行的都是同一个实例,为了防止数据冲突,务必将state定义为一个函数,返回数据对象 // 确保每次创建实例时,state都要通过一个函数动态的创建一个对象,这样数据就不会冲突和污染 export const state = () => { return { // 当前登录用户的登录状态数据 user: null } } export const mutations = { setUser(state, data) { state.user = data } } export const actions = {} ``` #### (2)登陆成功,将用户信息存入容器 ```js this.$store.commit('setUser', data.user) ``` #### (3)将登陆状态持久化道Cookie中 安装`js-cookie` ```bash yarn add js-cookie ``` 使用`js-cookie`将`data.user`数据存储到`cookie`中(31行):`Cookie.set('user', data.user)` ```js export default { name: "LoginIndex", data() { return { user: { username: '', email: '', password: '' }, errors: {} // 错误信息 } }, computed: { isLogin() { return this.$route.name === 'login' } }, methods: { async onSubmit() { try { // 提交表单请求登录 const {data} = this.isLogin ? await login({ user: this.user }) : await register({ user: this.user }) // 保存用户登录状态到容器 this.$store.commit('setUser', data.user) // 为了防止刷新页面数据丢失,需要将数据持久化,存到cookie中 Cookie.set('user', data.user) // 跳转到首页 this.$router.push('/') } catch (err) { // 请求失败 console.dir(err) this.errors = err.response.data.errors } } } } ``` #### (4)从Cookie中获取并初始化用户登录状态 安装`cookieparser` ```bash yarn add cookieparser ``` 使用`nuxtServerInit`在服务端渲染期间,从`cookie`中获取`user`数据,保存到`state`中的`user`对象中 ```js import cookieparser from 'cookieparser' // 在服务端渲染期间,运行的都是同一个实例,为了防止数据冲突,务必将state定义为一个函数,返回数据对象 // 确保每次创建实例时,state都要通过一个函数动态的创建一个对象,这样数据就不会冲突和污染 export const state = () => { return { // 当前登录用户的登录状态数据 user: null } } export const mutations = { setUser(state, data) { state.user = data } } export const actions = { // nuxtServerInit是一个特殊的action方法,尽在服务端渲染期间调用 // 初始化容器数据,从cookie中取出来放到state中 nuxtServerInit({commit}, {req}) { let user = null // 如果请求头中有Cookie if (req.headers.cookie) { // 使用cookieparser结构成对象 const parsed = cookieparser.parse(req.headers.cookie) try{ user = JSON.parse(parsed.user) } catch (e) { // No Valid cookie found } } // 提交mutation修改state状态 commit('setUser', user) } } ``` - 整体逻辑为:使用`mapState`将`store`中的`state.user`映射到`layout.vue`中,在模板中判断是否存在`user`,当存在时,展示**Home、New Post、Settings、用户头像信息**,当不存在时,只展示**Home、Sign In、Sign Up** ```html <template v-if="user"> <li class="nav-item"> <nuxt-link class="nav-link" to="/editor"> <i class="ion-compose"></i> New Post </nuxt-link> </li> <li class="nav-item"> <nuxt-link class="nav-link" to="/settings"> <i class="ion-gear-a"></i> Settings </nuxt-link> </li> <li class="nav-item"> <nuxt-link class="nav-link" to="/profile/123"> <img class="user-pic" :src="user.image"> {{ user.username }} </nuxt-link> </li> </template> <template v-else> <li class="nav-item"> <nuxt-link class="nav-link" to="/login">Sign in</nuxt-link> </li> <li class="nav-item"> <nuxt-link class="nav-link" to="/register">Sign up</nuxt-link> </li> </template> ``` ```js import {mapState} from 'vuex' export default { name: "LayoutIndex", computed: { ...mapState(['user']) } } ``` ### 处理页面访问权限 当前处理逻辑只是将登陆与否过程中是否渲染了Editor等路由,然而当用户直接在url访问localhost:3000/editor等路由时,依然可以访问页面,这时就需要使用**拦截器**来拦截这部分请求。 #### 路由中间件 > 中间件允许你定义一个自定义函数运行在一个页面或一组页面渲染之前。 > > 您可以通过在 middleware/ 目录中创建一个文件来创建命名中间件,文件名将是中间件名称。 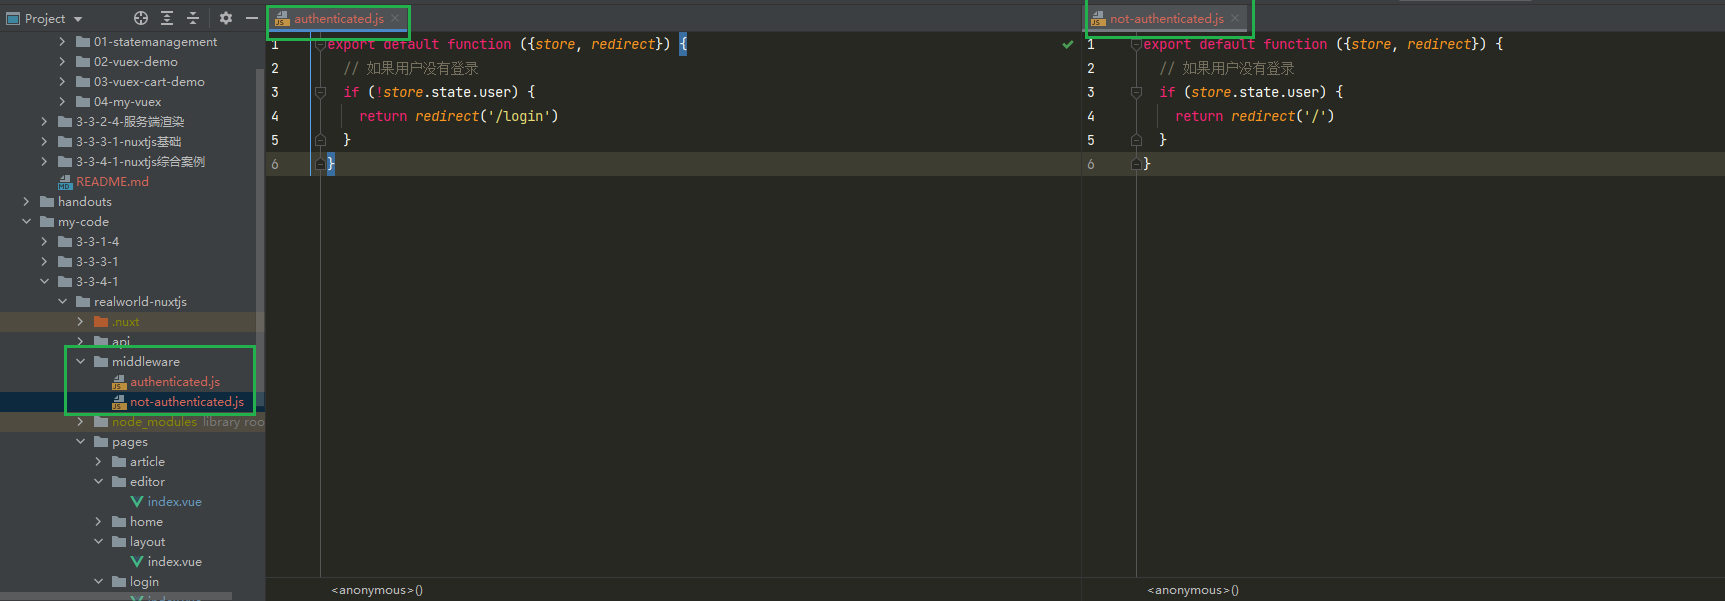 `middleware/authenticated.js` ```js export default function ({store, redirect}) { // 如果用户没有登录 if (!store.state.user) { return redirect('/login') } } ``` - 在需要判断登录权限的页面中配置使用中间件。 `editor.vue` ```js export default { // 在路由匹配组件之前会先执行中间件处理 middleware: 'authenticated', name: "EditorIndex" } ``` 同理,在settings、profile等页面也设置同样的中间件。 - 在登录后,不允许用户重复登录注册,同样设置中间件`not-authenticated.js`,禁止用户在登录后再次访问登录、注册页面。 `middleware/not-authenticated.js` ```js export default function ({store, redirect}) { // 如果用户没有登录 if (store.state.user) { return redirect('/') } } ``` - 在登陆注册页面加入`not-authenticated`中间件。 ## 首页模块 ### 展示公共文章列表 封装请求方法: ```js import request from "@/utils/request"; // 获取公共的文章列表 export const getArticles = params => { return request({ method: 'GET', url: '/api/articles', params }) } ``` home/index.vue获取数据,由于需要进行SEO优化,这里使用asyncData方法获取数据: ```js import {getArticles} from "@/api/article"; export default { name: "HomeIndex", // 有利于SEO async asyncData() { const {data} = await getArticles() return { articles: data.articles, articlesCount: data.articlesCount } } } ``` 模板绑定: ```html <div class="article-preview" v-for="article in articles" :key="article.slug" > <div class="article-meta"> <nuxt-link :to="{ name: 'profile', params: { username: article.author.username } }"> <img :src="article.author.image"/> </nuxt-link> <div class="info"> <nuxt-link class="author" :to="{ name: 'profile', params: { username: article.author.username } }">{{ article.author.username }} </nuxt-link> <span class="date">{{ article.createAt }}</span> </div> <button class="btn btn-outline-primary btn-sm pull-xs-right" :class="{ active: article.favorited }"> <i class="ion-heart"></i> {{ article.favoritesCount }} </button> </div> <nuxt-link class="preview-link" :to="{ name: 'article', params: { slug: article.slug } }" > <h1>{{ article.title }}</h1> <p>{{ article.description }}</p> <span>Read more...</span> </nuxt-link> </div> ``` ### 分页处理 #### 处理分页参数 首先定义page和limit,然后计算要请求的文章数量以及从哪一条文章开始取 ```js export default { name: "HomeIndex", // 有利于SEO async asyncData() { let page = 1 const limit = 20 const {data} = await getArticles({ limit, offset: (page - 1) * limit }) return { articles: data.articles, articlesCount: data.articlesCount } } } ``` #### 页码处理 分页模板: ```html <nav> <ul class="pagination"> <!--使用计算属性计算出totalPage,遍历循环出页面,并且绑定动态样式active--> <li class="page-item" v-for="item in totalPage" :key="item" :class="{ active: item === page }" > <!--绑定to属性,动态传递page参数--> <nuxt-link class="page-link" :to="{ name: 'home', query: { page: item } }">{{ item }} </nuxt-link> </li> </ul> </nav> ``` - 使用计算属性计算总页码 ```js computed: { totalPage() { return Math.ceil(this.articlesCount / this.limit) } } ``` - 遍历生成页码列表、设置导航链接 ```html <nav> <ul class="pagination"> <!--使用计算属性计算出totalPage,遍历循环出页面,并且绑定动态样式active--> <li class="page-item" v-for="item in totalPage" :key="item" :class="{ active: item === page }" > <!--绑定to属性,动态传递page参数--> <nuxt-link class="page-link" :to="{ name: 'home', query: { page: item } }">{{ item }} </nuxt-link> </li> </ul> </nav> ``` - 相应query参数变化  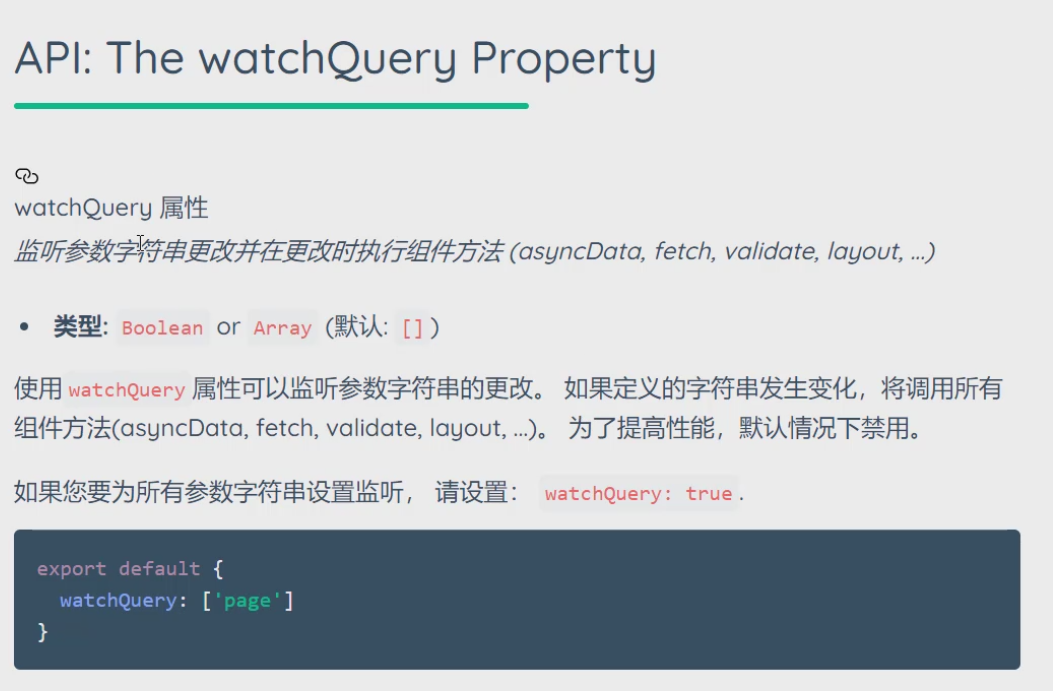 ```js watchQuery: ['page'], ``` ### 获取标签列表(Popular Tags) - 封装请求方法`api/tag.js` ```js import request from "@/utils/request"; // 获取文章标签列表 export const getTags = () => { return request({ method: 'GET', url: '/api/tags', }) } ``` - 在`home/index.vue`中获取数据 ```js export default { name: "HomeIndex", // 有利于SEO watchQuery: ['page'], async asyncData({query}) { // 从url中获取页码:localhost:3000?page=3 const page = Number.parseInt(query.page || 1) const limit = 20 const {data} = await getArticles({ limit, offset: (page - 1) * limit }) const {data: tagData} = await getTags() // 获取tags数据 return { articles: data.articles, articlesCount: data.articlesCount, limit, page, tags: tagData.tags // 返回tags数据给页面模板 } }, computed: { totalPage() { return Math.ceil(this.articlesCount / this.limit) } } } ``` - 遍历获取到的tags,渲染到页面 ```html <div class="tag-list"> <a href="" class="tag-pill tag-default" v-for="item in tags" :key="item" v-if="item">{{ item }}</a> </div> ``` #### 优化数据请求 前面请求的文章列表数据和标签列表数据在业务上并**没有互相依赖**的关系,因此可以将其从**串行执行请求数据**优化为**并行执行请求数据**,通过并行可以提高请求加载的速度。 ```js async asyncData({query}) { // 从url中获取页码:localhost:3000?page=3 const page = Number.parseInt(query.page || 1) const limit = 20 // 获取返回结果并解构 Promise.all 方法返回值未数组 const [articlesResponse, tagResponse] = await Promise.all([ getArticles({ limit, offset: (page - 1) * limit }), getTags() ]) // 解构结果值 const {articles, articlesCount} = articlesResponse.data const {tags} = tagResponse.data return { articles, articlesCount, limit, page, tags } }, ``` #### 标签列表链接和数据 - 处理标签列表链接,类似于分页页码的处理;在标签上绑定查询参数`?tag='something'` ```html <nuxt-link :to="{ name: 'home', query: { tag: item } }" class="tag-pill tag-default" v-for="item in tags" :key="item" v-if="item">{{ item }}</nuxt-link> ``` - 搭配`?page=3?tag=‘something’` ```html <nuxt-link class="page-link" :to="{ name: 'home', query: { page: item, tag: $route.query.tag } }">{{ item }} </nuxt-link> ``` #### 标签高亮及链接(Tab) - 业务逻辑:当用户登录后,显示**Your Feed**, 否则不显示**Your Feed**,只显示**Global Feed**。 - 获取user,判断user,是否展示Your Feed ```html <li v-if="user" class="nav-item"> <nuxt-link class="nav-link" ...>Your Feed</nuxt-link> </li> ``` - 业务逻辑:点击右侧**Popular Tag**时,动态显示`#{{ tag }}`的**tab**导航栏 - 判断当前url中是否有**tag**,如果有则动态的渲染**tab**导航栏 ```html <li v-if="tag"> ... </li> ``` - 在asyncData中需要返回tag属性 ```js async asyncData({query}) { // 从url中获取页码:localhost:3000?page=3 const page = Number.parseInt(query.page || 1) const limit = 20 const {tag} = query const [articlesResponse, tagResponse] = await Promise.all([ getArticles({ limit, offset: (page - 1) * limit, tag // 查询tag }), getTags() ]) const {articles, articlesCount} = articlesResponse.data const {tags} = tagResponse.data return { articles, articlesCount, limit, page, tags, tag, // 返回tag tab: query.tab || 'global_feed' } }, ``` - **Popular Tag** `query`查询参数中添加tag属性 ```html <div class="tag-list"> <nuxt-link :to="{ name: 'home', query: { tag: item, // 添加tag查询参数 tab: 'tag' } }" class="tag-pill tag-default" v-for="item in tags" :key="item" v-if="item">{{ item }} </nuxt-link> </div> ``` - 动态绑定Your Feed、Global Feed、#tag的active样式 - 给tab栏添加查询参数`tab: 'your_feed'`、`tab: 'global_feed'`、`tab: tag` - 精确匹配`exact`,`watchQueryt`中添加`tab` ```html <li v-if="user" class="nav-item"> <nuxt-link class="nav-link" :class="{ active: tab === 'your_feed' }" exact :to="{ name: 'home', query: { tab: 'your_feed' } }" href="">Your Feed </nuxt-link> </li> <li class="nav-item"> <nuxt-link class="nav-link" :class="{ active: tab === 'global_feed' }" exact :to="{ name: 'home', query: { tab: 'global_feed' } }">Global Feed </nuxt-link> </li> <li v-if="tag" class="nav-item"> <nuxt-link class="nav-link" :class="{ active: tab === 'tag' }" exact :to="{ name: 'home', query: { tab: 'tag', tag: tag } }">#{{ tag }} </nuxt-link> </li> ``` ```js watchQuery: ['page', 'tag', 'tab'], ``` - 在热门标签Popular Tags中,选择页码,发现Tab并没有被激活,所以需要在页码中家也如查询参数query,`tab:tab` ### 展示关注文章列表 将**Your Feed**中的数据渲染到该**Tab**中 - 首先在`asyncData`中解构出`store`对象,从`store`对象中获取`user`,用于传递到接口服务器,在接口中先手动写入用户`token` ```js // 获取关注的的文章列表 export const getFeedArticles = params => { return request({ method: 'GET', url: '/api/articles/feed', // 注意数据格式 headers: { Authorization: `Token eyJ0eXAiOiJKV1QiLCJhbGciOiJIUzI1NiJ9.eyJpZCI6MTkwMzIyLCJ1c2VybmFtZSI6IjVjb2RlciIsImV4cCI6MTYzMjUzNTA0NH0.i0tpsAKIB-462Vg_dOyCABZNcFwNMqRtvQ-jzoDTY6k` }, params }) } ``` - 根据用户登录状态、tab是否为your_feed两个条件决定加载全部文章或者关注的文章 ```js import {getArticles, getFeedArticles} from "@/api/article"; ... async asyncData({query, store}) { // 从url中获取页码:localhost:3000?page=3 const page = Number.parseInt(query.page || 1) const limit = 20 const {tag} = query const tab = query.tab || 'global_feed' // 判断加载全部文章或者关注文章 const loadArticles = store.state.user && tab === 'your_feed' ? getFeedArticles : getArticles const [articlesResponse, tagResponse] = await Promise.all([ loadArticles({ limit, offset: (page - 1) * limit, tag, }), getTags() ]) const {articles, articlesCount} = articlesResponse.data const {tags} = tagResponse.data return { articles, articlesCount, limit, page, tags, tag, tab: query.tab || 'global_feed' } }, ``` ### 统一添加数据token 在上一步中,我们手动设置的用户的token值,但是在实际的业务中需要动态的添加token值。也就是说需要在store中获取到`state.user.token`。但是在request.js中我们无法获取到store上下文对象。Nuxt.js为我们提供了一个插件机制,插件机制可以让我们在真正请求之前拦截到请求,并在请求中可以获取上下文对象(query、params、req、res、app、store...) 插件机制使用如下: 在项目根目录创建目录`plugins`以及文件`request.js`,导出默认成员,代码如下: `plugins/request.js` ```js /* * 基于 axios 封装的请求模块 * */ import axios from 'axios' // 创建请求对象 export const request = axios.create({ baseURL: 'https://conduit.productionready.io' }) // 插件导出函数必须作为default成员,而default成员只有一个 // 通过插件机制获取到上下文对象(query、params、req、res、app、store...) export default ({store}) => { console.log(123) // 请求拦截器 // 任何请求都要经过请求拦截器 // 我们可以在请求拦截器中做一些公共的业务处理,例如设置token request.interceptors.request.use(function (config) { // 请求就会经过这里 // 拿到用户的token const {user} = store.state if (user && user.token) { config.headers.Authorization = `Token ${user.token}` } // 返回config请求配置对象 return config }, function (error) { // 如果请求失败(此时请求还没有发出去)就会进入这里 return Promise.reject(error) }) } ``` 此外,当需要使用插件时,还需要在nuxt.config.js中进行注册插件,代码如下: ```js module.exports = { router: { ... }, // 注册插件 plugins: [ '~/plugins/request.js' ] } ``` `export default`导出默认成员时,可以使用对象解构,只解构出我们需要的`store`对象,然后在判断user以及user.token,当条件成立后,在config中配置headers,按照API文档就进行设置。 ```js const {user} = store.state if (user && user.token) { config.headers.Authorization = `Token ${user.token}` } ``` 此时,我们就不需要再使用`utils/request.js`中的方法了,需要在`api`中的所有文件(`articles.js`、`tag.js`、`user.js`)中替换导入 ```js import { request } from "@/plugins/request"; ``` 此时,在我们`home/index.vue`中的所有请求都会使用`plugins/request.js`,所有请求也会经过拦截器,进而统一设置用户`token`。 ### 日期格式处理 在线demo中,日期的展现形式是:简写月份 日期, 年份,所以我们需要将获取到的articles中的createAt字段改变为此格式。这里推荐一个类似于**moment.js**的插件[**dayjs.js**(Github)](https://github.com/iamkun/dayjs/blob/dev/docs/zh-cn/README.zh-CN.md)、[官方文档](https://dayjs.gitee.io/zh-CN/) > `Day.js` 是一个轻量的处理时间和日期的 JavaScript 库,和 Moment.js 的 API 设计保持完全一样. 如果您曾经用过 Moment.js, 那么您已经知道如何使用 `Day.js` 使用Vue中的**全局过滤器**,将日期格式化,这样可以更大限度的重用代码。同样需要在plugins目录中新建dayjs.js文件(文件名随意),代码如下: `plugins/dayjs.js` ```js import Vue from 'vue' import dayjs from 'dayjs' // {{ 表达式 | 过滤器 }} // filter第一个参数为过滤器名称 // filter第二个参数为函数,函数中的value为表达式返回的值 Vue.filter('date', (value, format = 'YYYY-MM-DD HH:mm:ss') => { return dayjs(value).format(format) }) ``` 在pages/home/index.vue中使用管道附链接,并传入参数: ```html <span class="date">{{ article.createAt | date('MMM DD, YYYY') }}</span> ``` ### 文章点赞 接下来处理文章点赞功能,业务逻辑: - 未点赞状态下,点击为点赞,数量加1 - 点赞状态下,点击为取消点赞,数量减1 **整体流程**: - 新增两个数据接口 `api/articles.js` ```js // 添加点赞 export const addFavorite = slug => { return request({ method: 'POST', url: `api/articles/${slug}/favorite` }) } // 取消点赞 export const deleteFavorite = slug => { return request({ method: 'DELETE', url: `api/articles/${slug}/favorite` }) } ``` - 在`pages/home/index.vue`中的点赞按钮中绑定事件 ```html <button class="btn btn-outline-primary btn-sm pull-xs-right" :class="{ active: article.favorited }" @click="onFavorite(article)" >...</button> ``` - 在`vm`实例中添加`methods` ```js methods: { async onFavorite(article) { // 如果已经点赞了,则取消点赞,否则则添加点赞 if (article.favorited) { await deleteFavorite(article.slug) // 处理视图 article.favorited = false // 数量减1 article.favoritesCount += -1 } else { await addFavorite(article.slug) article.favorited = true // 数量加1 article.favoritesCount += 1 } } } ``` - 处理在点赞和取消点赞过程中的`pedding`状态,防止用户快速点击按钮,实现思路为动态更改`button`的`disabled`属性 - 动态的在接收返回的`articles`数据中新增`favoriteDisabled`属性 ```js articles.forEach(articles => articles.favoriteDisabled = false) ``` `pages/home/index.vue` ```js <button class="btn btn-outline-primary btn-sm pull-xs-right" :class="{ active: article.favorited }" @click="onFavorite(article)" :disabled="article.favoriteDisabled" > <i class="ion-heart"></i> {{ article.favoritesCount }} </button> ``` - 点赞过程中动态的绑定`disabled`属性 ```js methods: { async onFavorite(article) { // disabled为true article.favoriteDisabled = true // 如果已经点赞了,则取消点赞,否则则添加点赞 if (article.favorited) { await deleteFavorite(article.slug) // 处理视图 article.favorited = false article.favoritesCount += -1 } else { await addFavorite(article.slug) article.favorited = true article.favoritesCount += 1 } // disabled为false article.favoriteDisabled = false } } ``` ## 文章详情 > 业务介绍: > > 1. 展示文章详情内容 > 1. 文章标题 > 2. 作者信息 > 3. 点赞 > 4. 正文 > 2. 文章评论功能 > 1. 发布评论 - 文章详情数据接口封装 `api/articles.js` ```js // 获取文章详情 export const getArticle = slug => { return request({ method: 'GET', url: `/api/articles/${slug}`, }) } ``` - 获取数据 `pages/article/index.vue` ```js import {getArticle} from "@/api/article"; export default { name: "ArticleIndex", // 通过对象结构,拿出params,进而拿到params.slug,即文章id async asyncData({params}) { const {data} = await getArticle(params.slug) return { article: data.article } } } ``` - 动态渲染文章数据 这里先只渲染文章`title`和文章`body`,并且文章`body`不进行**markdown**转换 ```html <h1>{{ article.title }}</h1> ... <div class="row article-content"> <div class="col-md-12"> {{ article.body }} </div> </div> ``` ### 把Markdown转为HTMl 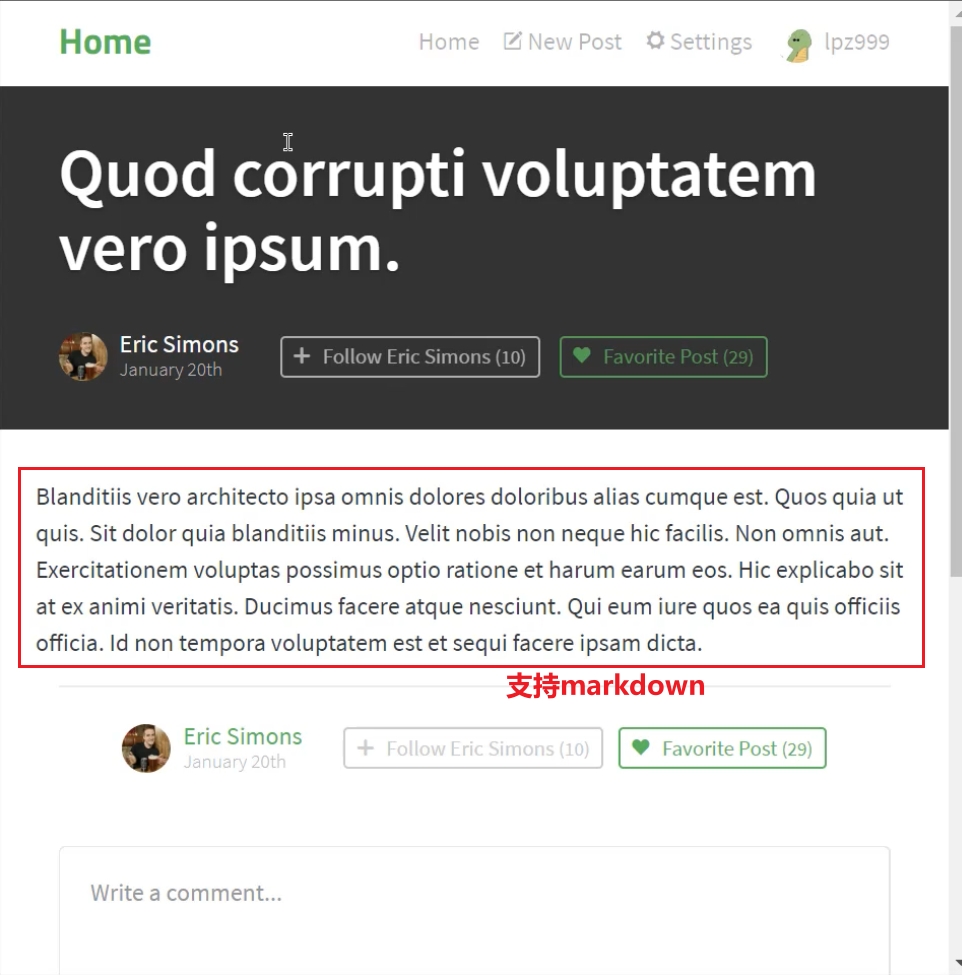 使用第三方插件[markdown-it](https://markdown-it.docschina.org/),该插件可以将`markdown`语法转换为`HTML`。在获取到`article.body`后,使用该插件方法将其转为`HTML`。 ```js import {getArticle} from "@/api/article"; import MarkdownIt from 'markdown-it' export default { name: "ArticleIndex", async asyncData({params}) { const {data} = await getArticle(params.slug) const {article} = data const md = new MarkdownIt() article.body = md.render(article.body) return { article } } } ``` 在模板中,使用`v-html`指令填充`article.body` ```html <div class="col-md-12" v-html="article.body"></div> ``` ### 展示文章作者相关信息   文章详情页面中有两部分功能相似: > 文章作者信息、关注按钮、点赞按钮 - 首先封装组件 `pages/article/components/article-meta.vue` ```html <template> <div class="article-meta"> <nuxt-link :to="{ name: 'profile', params: { username: article.author.username } }"> } <img :src="article.author.image"/> </nuxt-link> <div class="info"> <nuxt-link :to="{ name: 'profile', params: { username: article.author.username } }" class="author">{{ article.author.username }} </nuxt-link> <span class="date">{{ article.createdAt | date('MMM DD, YYYY') }}</span> </div> <button class="btn btn-sm btn-outline-secondary" :class="{ active: article.author.following }" > <i class="ion-plus-round"></i> Follow Eric Simons <span class="counter">({{ article.followCount }})</span> </button> <button class="btn btn-sm btn-outline-primary" :class="{ active: article.favorited }" @click="onFavorite(article)" > <i class="ion-heart"></i> Favorite Post <span class="counter">({{ article.favoritesCount }})</span> </button> </div> </template> <script> import {addFavorite, deleteFavorite} from "@/api/article"; export default { name: "ArticleMeta", props: { article: { type: Object, required: true } }, methods: { async onFavorite(article) { article.favoriteDisabled = true // 如果已经点赞了,则取消点赞,否则则添加点赞 if (article.favorited) { await deleteFavorite(article.slug) // 处理视图 article.favorited = false article.favoritesCount += -1 } else { await addFavorite(article.slug) article.favorited = true article.favoritesCount += 1 } article.favoriteDisabled = false } } } </script> <style scoped> </style> ``` - 在`article/index.vue`中的**两个地方**使用组件,并且传递`article`到`article-meta.vue`中,`article-meta.vue`使用`props`接受`article`数据,如上方代码 ```html <article-meta :article="article"/> ``` - 动态遍历渲染`article`以及作者相关信息,如封装组件中的代码 - 动态绑定点赞按钮事件,与之前的`home/index.vue`中的用法相同 ```html <button class="btn btn-sm btn-outline-primary" :class="{ active: article.favorited }" @click="onFavorite(article)" > <i class="ion-heart"></i> Favorite Post <span class="counter">({{ article.favoritesCount }})</span> </button> ``` ```js methods: { async onFavorite(article) { article.favoriteDisabled = true // 如果已经点赞了,则取消点赞,否则则添加点赞 if (article.favorited) { await deleteFavorite(article.slug) // 处理视图 article.favorited = false article.favoritesCount += -1 } else { await addFavorite(article.slug) article.favorited = true article.favoritesCount += 1 } article.favoriteDisabled = false } } ``` TODO 关注按钮事件,其原理与点赞按钮相同,封装API请求,点击按钮,判断当前状态,更改数据 ### 设置页面meta优化SEO - 修改页面标题,希望在页面标题中出现文章的标题 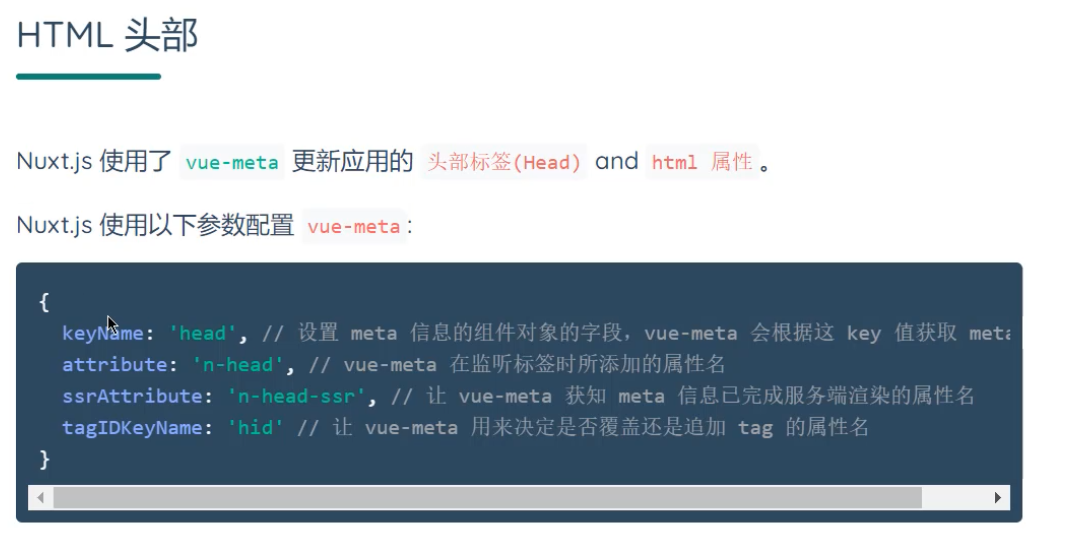 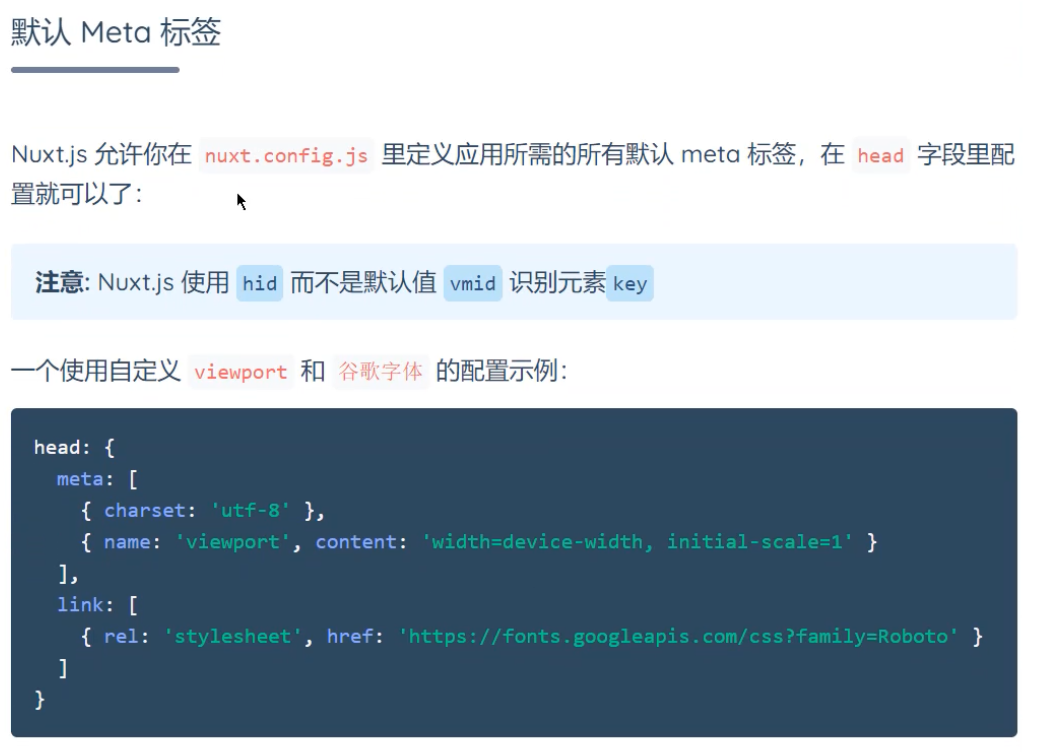 [特定页面的Meta标签用法](https://www.nuxtjs.cn/api/pages-head) > Nuxt.js 使用了 [`vue-meta`](https://github.com/nuxt/vue-meta) 更新应用的 `头部标签(Head)` 和 `html 属性`。 > > - **类型:** `Object` 或 `Function` > > 使用 `head` 方法设置当前页面的头部标签。 > > 在 `head` 方法里可通过 `this` 关键字来获取组件的数据,你可以利用页面组件的数据来设置个性化的 `meta` 标签。 ```html <template> <h1>{{ title }}</h1> </template> <script> export default { data() { return { title: 'Hello World!' } }, head() { return { title: this.title, meta: [ { hid: 'description', name: 'description', content: 'My custom description' } ] } } } </script> ``` > 注意:为了避免子组件中的 meta 标签不能正确覆盖父组件中相同的标签而产生重复的现象,建议利用 `hid` 键为 `meta` 标签配一个唯一的标识编号。 `article/index.vue` ```js import {addFavorite, deleteFavorite} from "@/api/article"; export default { name: "ArticleMeta", props: { article: { type: Object, required: true } }, methods: { async onFavorite(article) { article.favoriteDisabled = true // 如果已经点赞了,则取消点赞,否则则添加点赞 if (article.favorited) { await deleteFavorite(article.slug) // 处理视图 article.favorited = false article.favoritesCount += -1 } else { await addFavorite(article.slug) article.favorited = true article.favoritesCount += 1 } article.favoriteDisabled = false } }, head() { return { title: `${this.article.title} - RealWorld`, meta: [ { hid: 'description', name: 'description', content: this.article.description } ] } } } ``` 显示效果 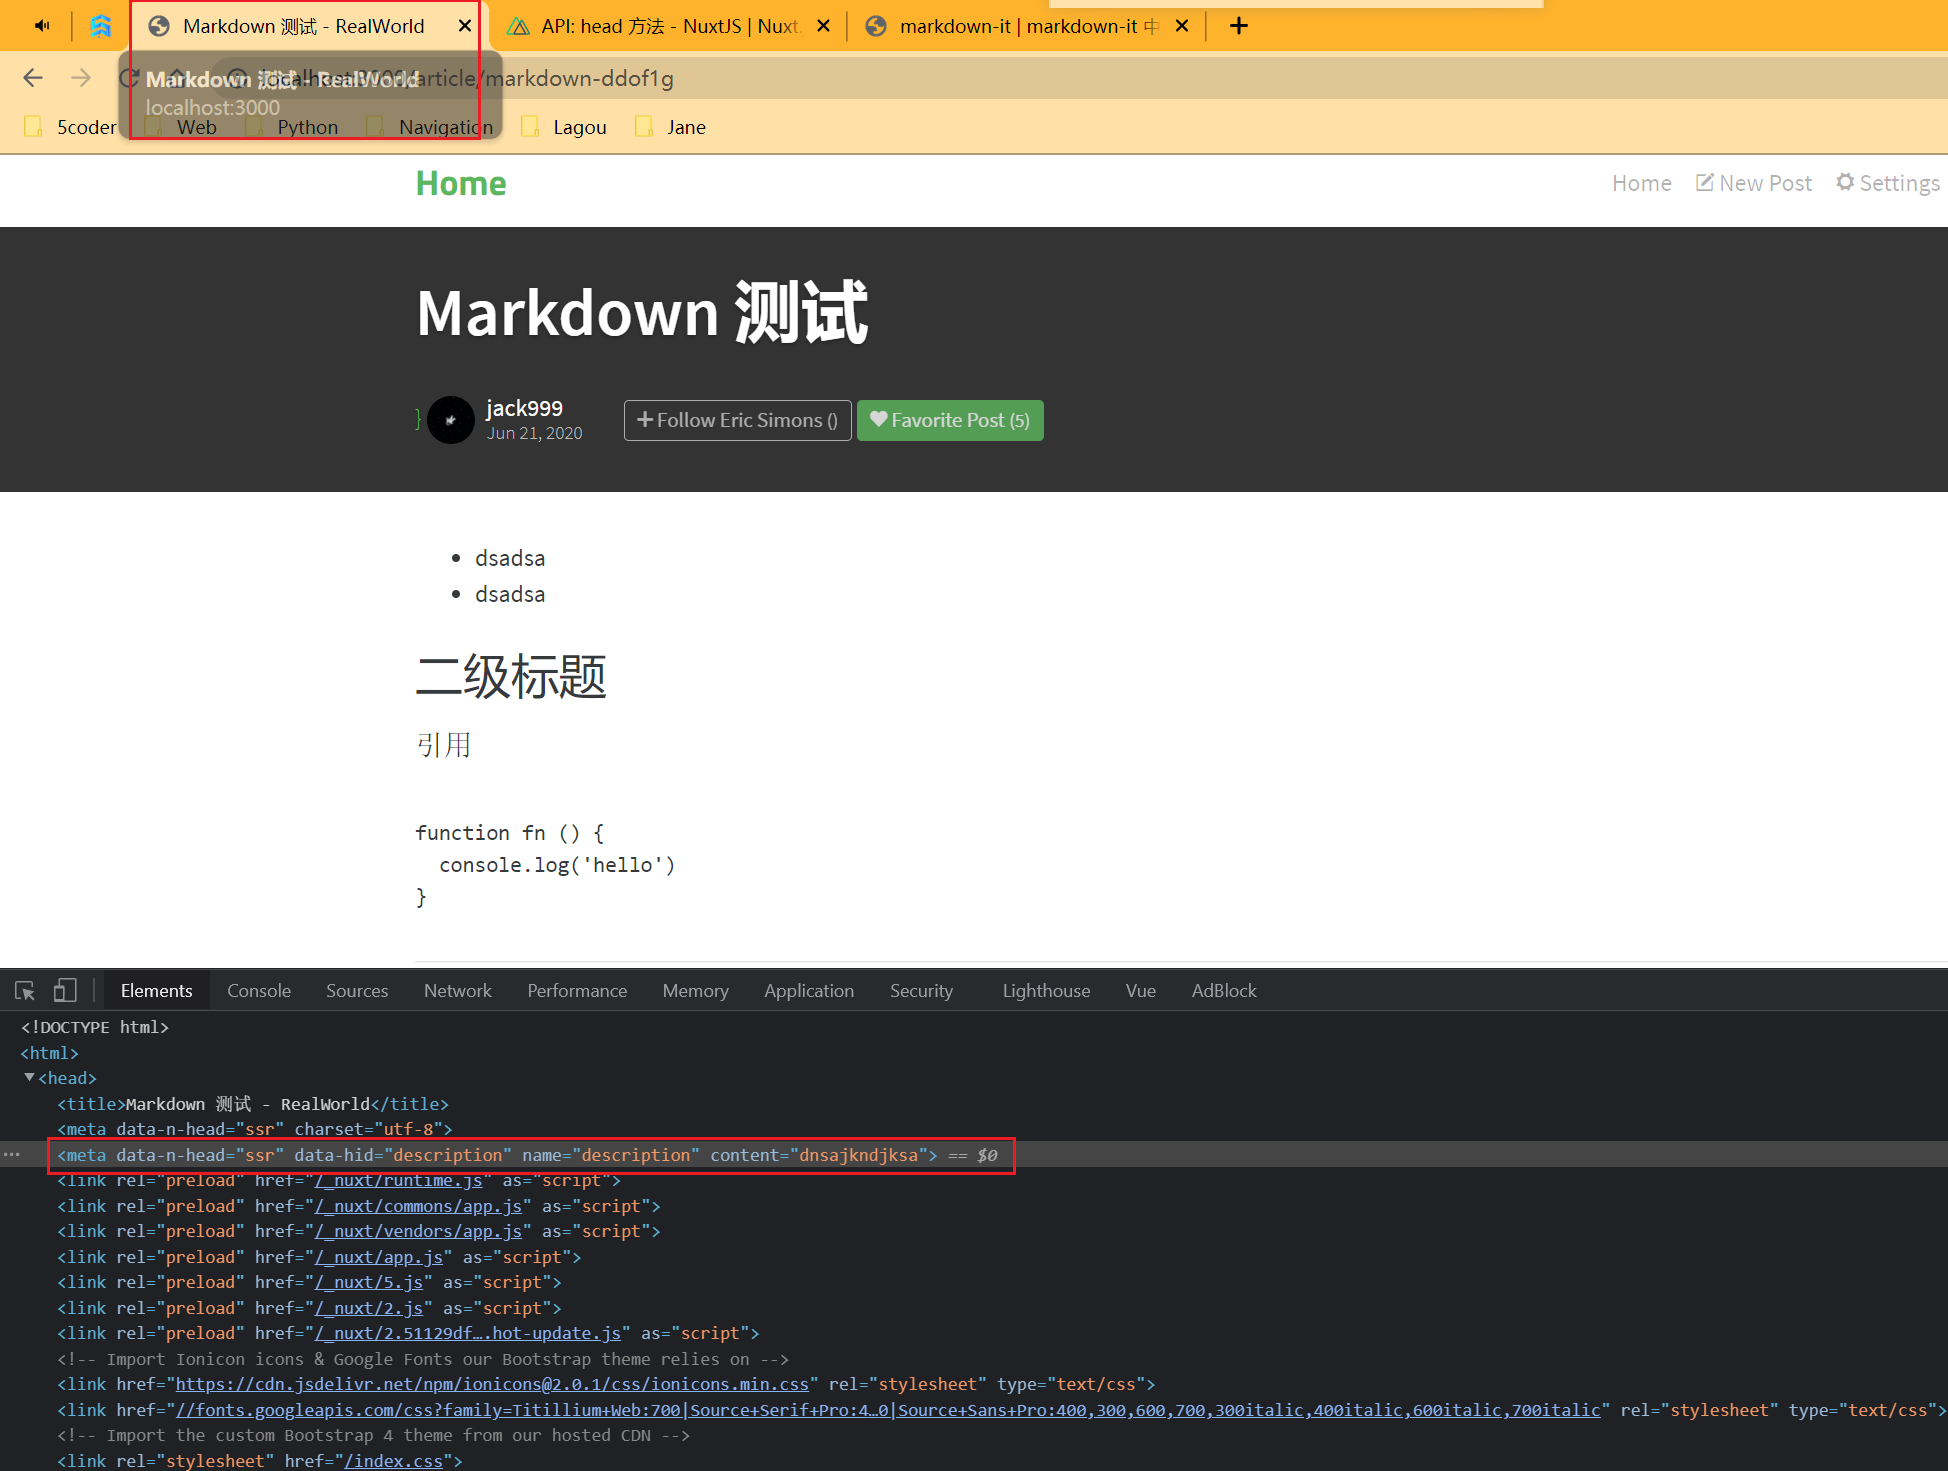 ### 文章评论 - 首先封装组件`article-comments.vue`,将评论部分抽离出来单独获取数据。 - 使用Vue生命周期函数mounted(此部分不需要SEO优化,因此采用客户端渲染)加载数据 - 使用封装好的组件,传递相关的文章对象`article` - 渲染遍历数据 `article-comments.vue` ```html <template> <div> <form class="card comment-form"> <div class="card-block"> <textarea class="form-control" placeholder="Write a comment..." rows="3"></textarea> </div> <div class="card-footer"> <img src="http://i.imgur.com/Qr71crq.jpg" class="comment-author-img"/> <button class="btn btn-sm btn-primary"> Post Comment </button> </div> </form> <div class="card" v-for="comment in comments" :key="comment.id" > <div class="card-block"> <p class="card-text">{{ comment.body }}</p> </div> <div class="card-footer"> <nuxt-link :to="{ name: 'profile', params: { username: comment.author.username } }" class="comment-author"> <img :src="comment.author.image" class="comment-author-img"/> </nuxt-link> <nuxt-link :to="{ name: 'profile', params: { username: comment.author.username } }" class="comment-author">{{ comment.author.username }} </nuxt-link> <span class="date-posted">{{ comment.createdAt | date('MMM DD, YYYY') }}</span> </div> </div> </div> </template> <script> import {getComments} from "@/api/article"; export default { name: "ArticleComments", props: { article: { type: Object, required: true } }, data() { return { comments: [] // 文章列表评论 } }, async mounted() { const {data} = await getComments(this.article.slug) console.log(data) this.comments = data.comments } } </script> <style scoped> </style> ``` ## 发布部署 ### 打包 ### 最简单的部署方式 ### 使用PM2启动Node服务 ### 自定化部署介绍 ### 准备自动部署内容 ### 自动部署完成
Nuxt
Leo
2022年10月28日 17:42
转发文档
收藏文档
上一篇
下一篇
手机扫码
复制链接
手机扫一扫转发分享
复制链接
Markdown文件
分享
链接
类型
密码
更新密码